Double-V Dies
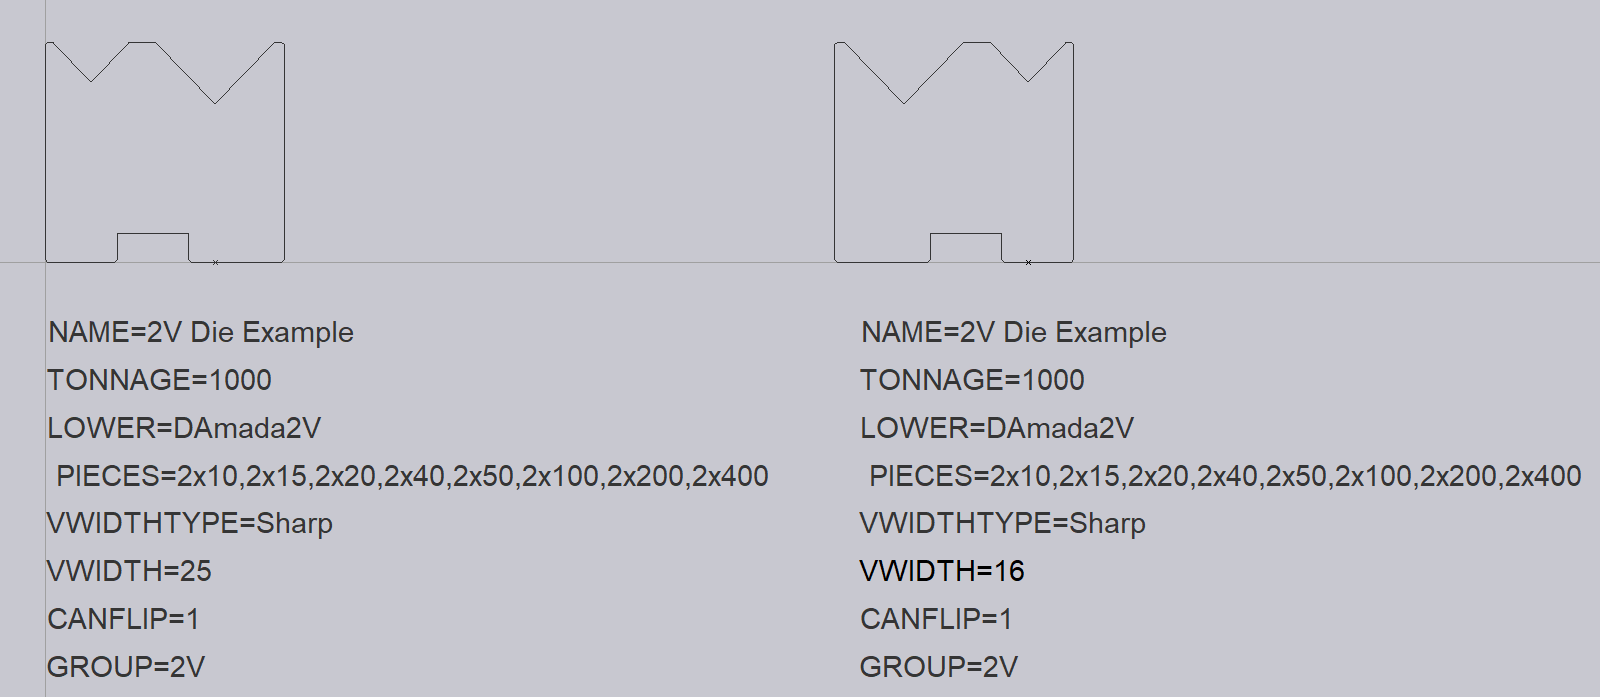
Below, we can see a sample Double-V Die DXF drawing. Two separate drawing files will need to be created for each V-width. For example, on the left, we can see that we have the 25mm V-Width. On the right, we can see that we have the 16mm V-Width. An origin point will need to be placed at the mounting point on the side profile of the tool. In this case, we can see that the point has been used to represent the V that will be in use.

The following text entities are required for a Double-V Die:
NAME – This is the name given for the tool.
TONNAGE – This is the tonnage of the tool in kN.
LOWER- This is the lower die valency of the tool.
PIECES – These are the required tool lengths. These are separated by a comma, and if more than one is required, we can use a multiplier to specify the value required.
VWIDTHTYPE – This is the point where the V-width will be measured. In this case, it is measured from the theoretical sharp.
V-WIDTH – This is the width of the V for the tool. Note that only the V that is in use will need to be specified here.
CANFLIP – If the tool can be flipped when mounted, this should be set to 1.
GROUP – This can be used to specify the tool group that this tool would belong to. In this case, it is 2V.

