Positioning Back Gauges
Exact gauging positions can be set by typing in Z, X and R values; however, it is often easier to position the gauges by dragging them into contact with the part. To do this click the selected back gauge, then click and hold on the same back gauge and start to drag left or right. To select multiple back gauges use shift and click to select the desired back gauges, click and hold on the last back gauge and again start to drag to the required position.
Depending on the viewpoint, the gauge will be dragged along either a horizontal or vertical plane. Start with the gauge away from the part, and drag it towards the part until it touches, continuing to drag further will show a wireframe which will continue moving, however, the actual gauge stops when it touches the part.

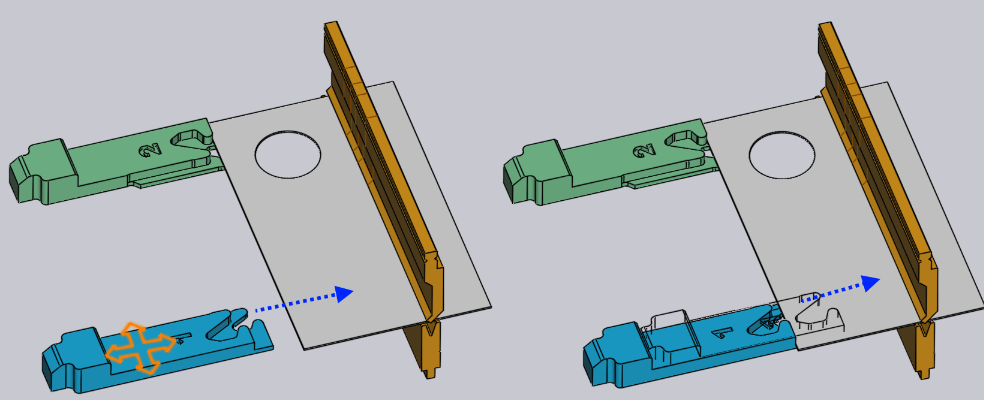
The image above shows this in operation. Dragging the gauge towards the sheet in the direction indicated by the arrow. As soon as the gauge touches the sheet, it stops, and just a wireframe representation continues moving (to show you where you are attempting to drag the gauge). This makes it easy to position the gauge, so it is just touching the part without any gaps and any collisions.
Also, in this image above, we are looking at the gauge from a viewpoint that is close to top-down. So, the gauge moves in the XZ plane, and the R-value of the gauge is kept constant. If you rotate the view to a more end view, the gauge will move in the XR plane, and the Z value will be constant.
Clamp-Snaps
When using the stop-type surfaces of a back gauge it is easy to precisely position the gauges. However, if one of the clamp-type surfaces is being used, this is trickier since it is necessary to engage both surfaces of a clamping finger against the part.
The software makes this easier by providing automatic snaps when the gauge is near a possible clamping position. To use this mechanism, rotate the view to see the gauges from the top down. Then, drag the gauges so the corner of the clamp fits near the aperture of the fingers.

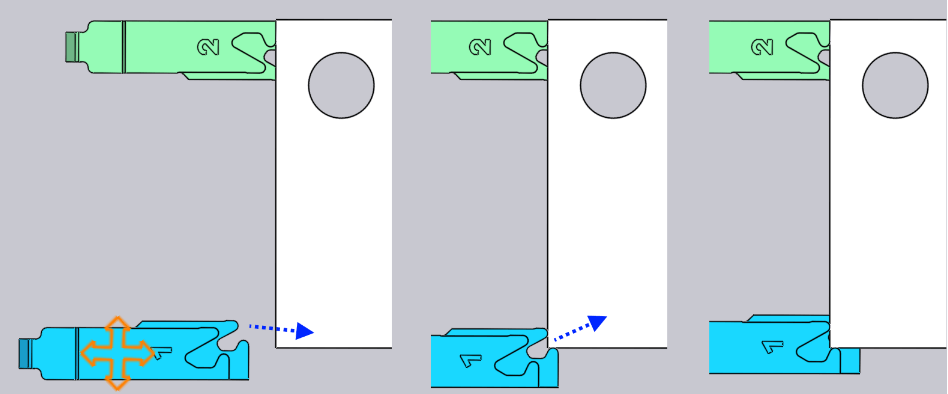
The image above shows a clamping operation in progress. Dragging the gauge close to a clamping position will snap it into the first clamp position (see image above, centre). Dragging further, the gauge will then snap into the second clamp position (see image above, right).
Note: that the R-value of the gauge is automatically adjusted up or down when moving to these different clamping snaps.

