Editing Back Gauges
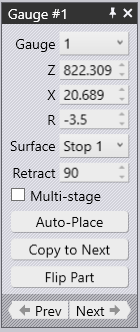
Back-gauge positions for each bend can be adjusted by clicking on the Gauge section in the Bend Status Navigator or clicking the back-gauge itself. This opens the Gauge dialogue as shown below.

Gauge – This is the selector to choose the gauge to edit.
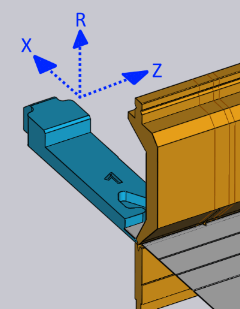
Z, X and R – These inputs are used to adjust the position of the gauges in three dimensions. For most press brakes, the axes are as indicated in the image below as depending on the press brake in use, the names of these axes may be different.

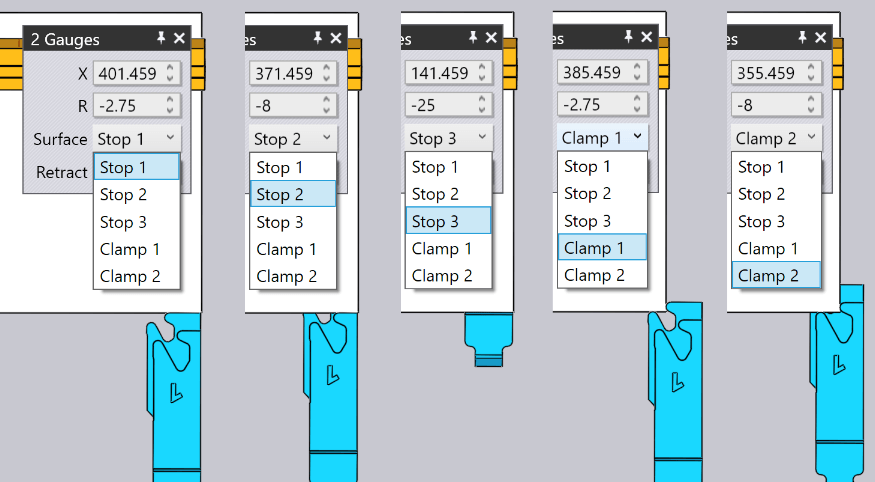
Surface – This is used to engage a different surface of the gauging finger to the part. The set of surfaces available depends on the machine, and not all surfaces may be applicable for all bends. The image below shows different surfaces being used.

Retract – This setting is used to set the gauge-retraction distance before bending. For some bends, the gauge has to be retracted in the +X direction by some distance after the part is pinched by the punch, but before it is bent to avoid a collision. When editing this, the bend will retract the gauge by the specified amount as a preview, to be able to judge whether the retraction will be sufficient.
Multi-Stage – This switch will be displayed depending on the type of machine being used. Turning this on will expand the gauge panel to show 3 retraction vectors, one for each stage of retraction. Each vector is of form X, R, and Z.
Auto-Place – This switch is used to compute a position automatically for the specified gauge. In general, the bend will have multiple gauging possibilities, and repeatedly clicking the Auto-Place button will cycle through those possibilities. To revert to the default, close the gauge panel, click on the gauge again, and then click Auto-Place – the first position selected is the default (that would also be the result of the original auto-sequencing and tooling).
Copy to Next – This switch will copy gauge Z1 and Z2 positions to the next gauge.
Flip Part – This switch is used to insert the other side of the part into the machine and compute gauging afresh. This is similar to the Flip Part button in the bent panel.
Prev – This is a navigation switch which will display the gauge panel for the previous bend.
Next – This is a navigation switch which will display the gauge panel for the next bend.

