Forms and Components
Form Detection
The software can detect punch forms which are on one layer in a metal model. If a surface model is converted into a metal model, all formed areas are detected and converted into punch forms. If the punch form has already been detected, it is light green, otherwise, it is yellow.
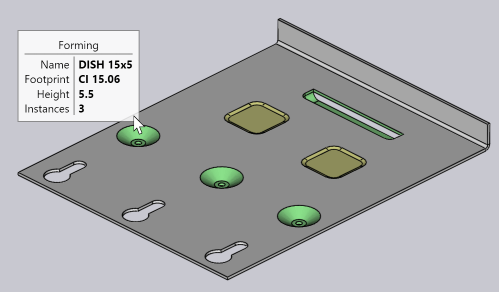
Press a yellow punch form on the surface. The “Forming” screen opens.
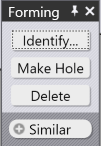
Make Hole: The punch form is converted into a hole.
Delete: The punch form is deleted.
Similar: This function selects all forms which are similar in appearance to the selected form.
Press Identify…. The “Add form” screen opens.
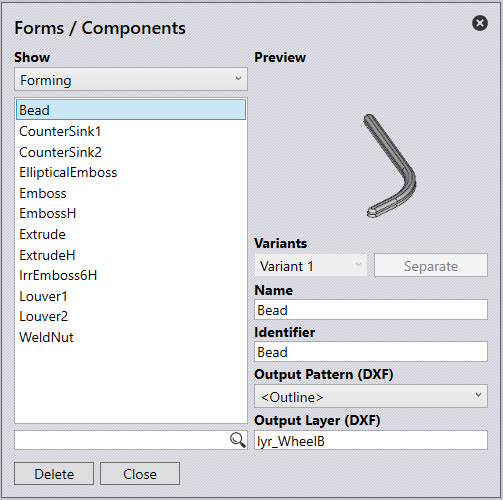
Show – All other forms which are already defined are also displayed here. This form can be displayed as a reference by clicking on a name. To go back to adding the new form, you must click on *NEW* at the top of the list.
Preview – Shows a preview of the selected form.
Variants – The same name as the name for an existing form can be used. This is normal as there are different ways to model a form. If several forms with the same name are added, they become variants. Forms with several variants have their quantity listed after their name (e.g.: x4). If one of these forms is selected, all different variants can be displayed. All of these different variants have the same name and the same ID. They are only depicted in different forms. If the software detects one of these forms in an assembly, this form will be marked with this name and this ID. Two different forms with the same name may have been grouped incorrectly. In such a situation, the Separate button can be used to separate the specific variants with a new name. Conversely, if two forms that originally had different names are to be grouped, simply select one of them and rename it so that it coordinates with the other one. Both are grouped as variants of the same form.
Name – This name is used to display the form.
Identifier – An ID can be entered here.
Output Layer (DXF) – This setting is used to specify a specific layer at which this form is output. This is used by the punch CAM system to assign a suitable punching tool.
Press Add to add the Form to the database.
Component Detection
Components such as nuts, and screws,… do not normally require any additional processing in this software. However, it is useful to collect, detect and use such components to generate possible bills of material of additionally purchased items that are required to compose the assembly.
There are major differences in practice in how even a standard component such as an M8 screw is actually drawn. The software uses a learning system that learns such component names based on the example. In the beginning, Bend does not know any standard components and they are displayed in yellow (not identified). To detect the component:
Press a yellow component on the surface. The “Surface” screen opens.

Press Identify…. The “Add component” screen opens.
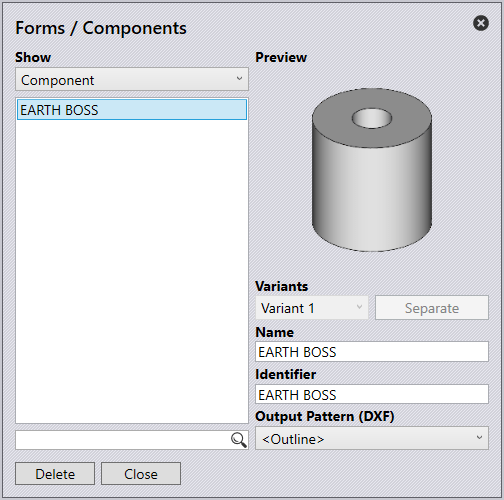
Show – All other components which are already defined are also displayed here. This component can be displayed as a reference by clicking on a name. To go back to adding the new component, you must click on *NEW* at the top of the list.
Preview – Shows a preview of the selected component.
Variants – The same name as the name for an existing component can be used. It is common for there to be different ways in which, for example, the same M8 screw is modelled. If several components with the same name are added, they become variants. Components with several variants have their quantity listed after their name (e.g.: x4). If one of these components is selected, all different variants can be displayed. All of these different variants have the same name and the same ID. They are only depicted by different 3D models. If the software detects one of these 3D models in an assembly, this component will be marked with this name and this ID. Two different components with the same name may have been grouped incorrectly. In such a situation, the Separate button can be used to separate the specific variants with a new name. Conversely, if two components that originally had different names are to be grouped, simply select one of them and rename it so that it coordinates with the other one. Both are grouped as variants of the same component.
Name – This name is used to display the component.
Identifier – An ID can be entered here.
Press Add to add the component to the database.
