How Can We Help?
-
Bend Configuration
-
Bend Workflow
-
-
- Block Die
- Double-V Dies
- EV-F Hem Dies
- Hem Block Dies
- Rollbend Dies
- Spring-Loaded Hemming Dies (Feather-Hemming Dies)
- V Die
- Z-Bend Dies
- Show all articles (3) Collapse Articles
-
- Gooseneck Punch
- Hem Punches
- Narrow Relief Punch
- Pointed Punch
- Radius Punch
- Sash Punch
- Standard Punch
- Straight Punch
- Z-Bend Punch
- Show all articles (4) Collapse Articles
- Adapt Geometry
- Assemblies
- Batch Processing
- Bend Deductions
- Changing the Bending Sequence
- Control Visibility
- Forms and Components
- Generating Bend Outputs
- Recomputing the Bend Solution
- Reviewing the Bend Solution
- Switching to a Different Machine
- The Bend Status Navigator
- Show all articles (7) Collapse Articles
< All Topics
Dragging a Tool Mount
UpdatedJune 27, 2023
0
0
The Position input box can be used to position a tool mount precisely. Often, it is easier to drag a bend into the required position. To do this, click the selected bend mount, then click and hold on the same bend mount and start to drag left or right.
To select multiple mounts use shift and click to select the desired mounts, click and hold on the last bend mount and again start to drag to the required position.

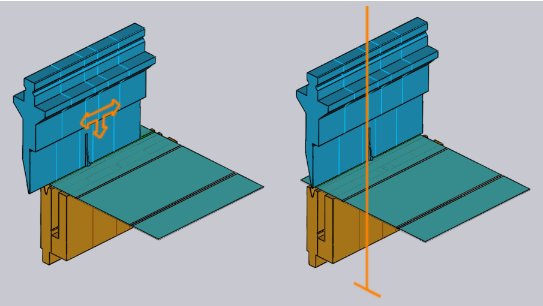
As shown in the image above, when moving the mouse over a selected mount, an arrowhead is displayed indicating the snap point for moving. The snap indicators allow easy alignment of the mount to other existing mounts.
Table of Contents