Editing a Tool Mount
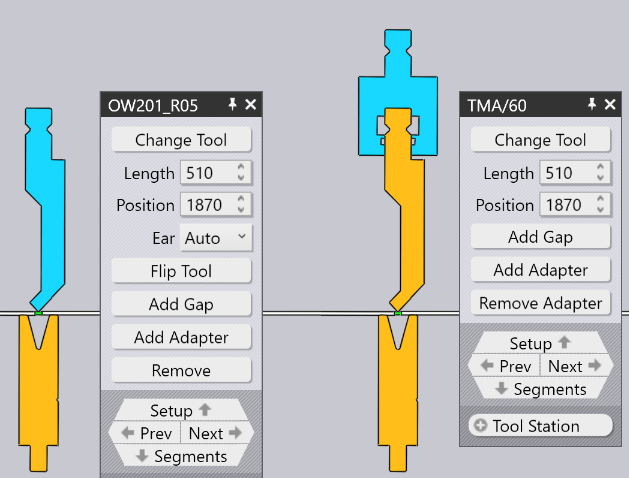
Select a tool mount to display the tool edit dialogue. This can be used to modify various settings of the bend mount and to perform several operations.
When editing a tool mount using any of the next settings and operations, the software will immediately validate the status of all bend operations, by performing various checks, such as collisions and tool usability. The bend navigator status updates immediately and in real-time, making it very easy to experiment with various settings with immediate and accurate feedback.

The exact settings and operations available will vary depending on the type of tool selected, for example, a punch, die or adapter mount. In addition, some settings may be available or unavailable depending on the machine’s capabilities.
Change Tool – This switch is used to replace the tool currently being used for a different tool.
Length – This section is used to adjust the length of the station. When a new value is entered here, the bend will compose the station again using an appropriate set of segments to try and match the requested length as closely as possible.
Position – This section is used to set the position of the left edge of the mount, along the machine’s table or beam. The position can also be adjusted by dragging the mount left or right.
Ear – This option is used to manually select ear/shoulder pieces in the composition. This option is only displayed when a punch is selected.
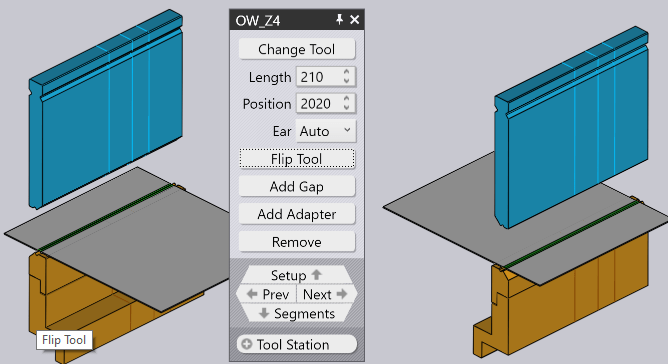
Flip Tool – This switch is used to turn the tool front to back. It is displayed when editing a mount that uses an asymmetric tool (such as a gooseneck tool, for example). The flip operation is intelligent enough to figure out if additional holders and tools need to be flipped to maintain consistency. For instance, in the image below, flipping the OW_Z4 punch (used for Z-bending) also flips the die, the holder and even the part to maintain process consistency.

ACB Sensor – This option is used to cycle through the different ACB sensor disk pairs that can be used for this part. The selection depends on the machine configuration, sheet thickness, and the punch used.
Add Adapter – This switch is used to add an extender to increase the height of the punch or die. When adding an adapter, the adapter is selected and the panel for the adapter is displayed. Note that if the punch tool height exceeds the adapter height limit, an adapter will not be mounted.

Add Gap – This switch is used to add a gap into the tool mount to allow a flange to pass through without collisions.
Taller Tool – This option will replace the tool with a different taller tool from the same family.
Remove – This will remove the selected tool.
Setup – This is a navigation button which will change the display to allow editing of the bend setup.
Prev – This is a navigation button which will highlight the previous tool mount in the setup for editing.
Next – This is a navigation button which will highlight the next tool mount in the setup for editing.
Segments – This is a navigation button which will change the display to allow the editing of individual segments making up this mount.
Tool Station – This option will select all the tool mounts making up this station. This will select all the punches, dies and holders that are aligned with the selected mount, so they can all be edited or moved together.
Same Tool – This option will select all the tool mounts that use the same tool. This is useful before implementing a tool change; selecting all the stations using the specified tool broadens the available selection of replacement tools. For example, if you are doing a change tool operation on only one punch station, and there are multiple punch stations, then you will be restricted to choosing only other punch tools that are the same height, to avoid punch-die collisions because of uneven gaps.

