Quick-Nest
Once a part has been tooled, the part can be nested on a sheet using the Quick-nest option in the workflow. Alternatively, use the shortcut key N to jump straight to the Nest screen and sequencing is automatically calculated. To nest a single part on a sheet, hold the shift key whilst clicking on the Quick-nest option. To alter the sheet and nesting settings before nesting, select the window icon next to the Quick-nest option or hold the Ctrl key and again click the Quick-nest option.
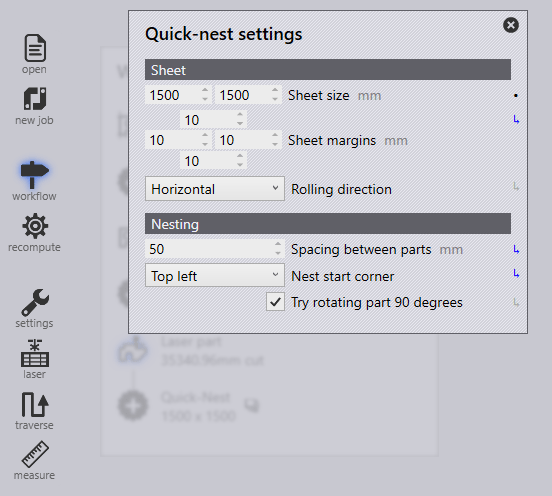
Sheet
Sheet Size – This setting inputs the parameter of the sheet size (Width+Height) to be used for nesting.
Sheet Margins – These four parameters (top, left, right and bottom) are to input the margins from the edge sheet to where the nesting of parts can start.
Rolling Direction – This is to select the grain direction of the sheet.
None – The sheet has no grain restriction.
Horizontal – Grain aligned with horizontal direction (X)
Vertical – Grain aligned with the vertical direction (Y)
Nesting
Spacing Between Parts – This option is to specify the spacing between the parts in the nest.
Nest Start Corner – This setting is to determine which corner of the sheet to start nesting parts.
Try Rotating Part 90 Degrees – Enabling this option will try rotating parts by 90 degrees to try and increase sheet packing and utilisation