Microjoints
Once a part has been tooled, modification of the tooling can be done by the user. Selecting an element of the laser tooling will display the Laser Cut dialogue, and from this select contour which will open the Contour dialogue.
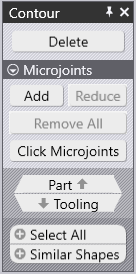
Delete – This will remove the tooling for the selected contour.
Add – This option will add or increase micro joints on the contour.
Reduce – This option will remove a microjoint. Repositions remaining micro joints to be at equal distances.
Remove All – This option will delete all micro joints.
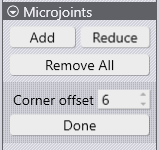
Click Microjoints – This is a special mode where the user can interactively add/remove micro joints by clicking on the contour. Usual snap points are available to insert micro joints. A special snap point at a standard offset from the corner (entered in the ‘Corner Offset’ field shown below) is also available
Part – This is a navigational option which will navigate to the part-level options
Tooling – This is a navigational option which will navigate to edit individual cuts on this contour.
Select All – This will select all contours in the part, allowing micro joints to be added/removed.
Similar Shapes – This option will select all identical laser cuts in the part. For example, laser tooling of all 10mm size circles can be selected.