Inserting a Table
You can insert a table into a report, by choosing one of the items that displays a table icon. For example, if you go to the Part > Bend > Bends, an option will appear allowing you to add a bend table. This table is used to display some information about all the bend operations in a part.
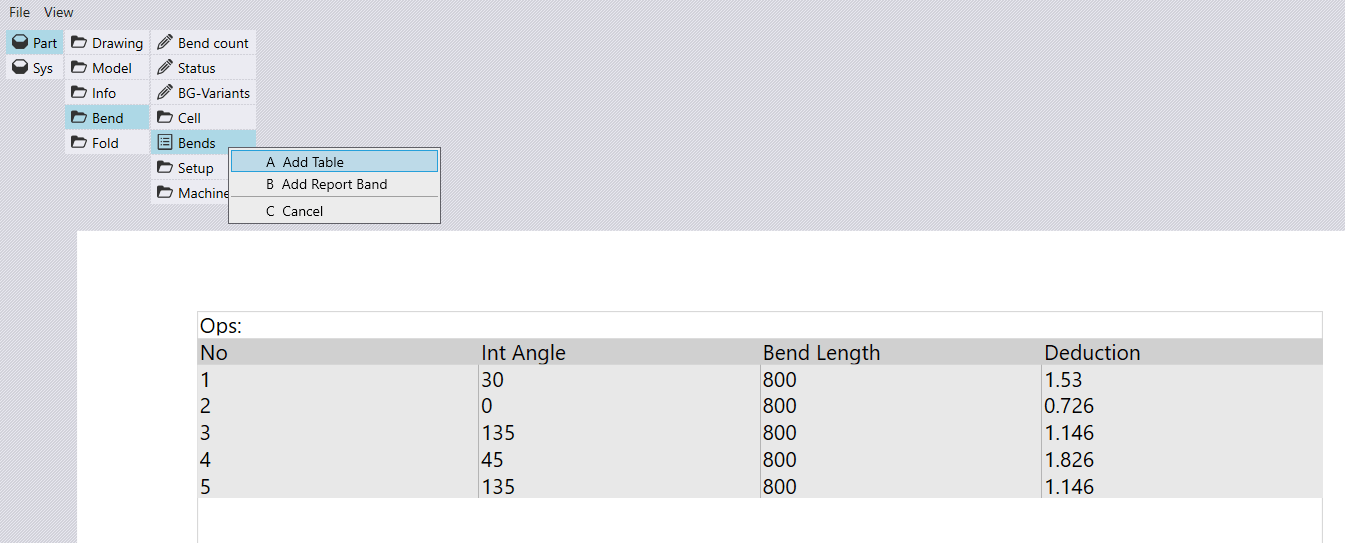
Click on the inserted table to display the Table dialogue box.
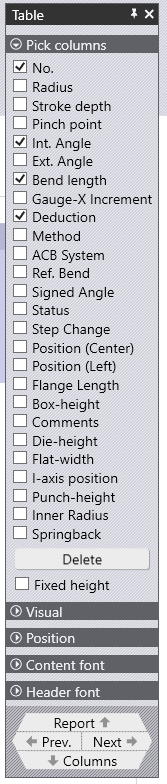
The Pick Columns section is used to select the columns that are displayed in the table (from among all the columns available for this tabular data).
You can edit more attributes of each column by clicking on the Column navigation link at the bottom of the table’s panel. This brings up the Column editor, where the attributes of the Column can be edited.
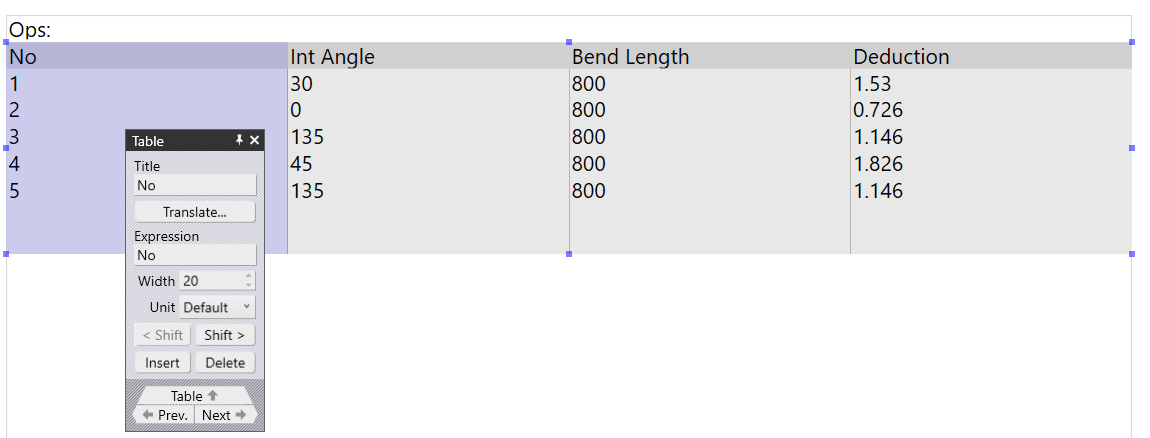
Title – This field is used to set the displayed title for the column.
Translate – Clicking on this option will bring up the Translations table, allowing you to populate different language options for the specified label in the report.
Expression – This field is the internal Flux data that is displayed in this column.
Width – This is the width of the column.
Unit – This is the unit of measurement to use for the column.
You can use the Shift buttons to shift this column left or right in the ordering, and use the Insert and Delete buttons to insert new columns, or to delete the selected column.