Job Planning
Praxis uses jobs to capture and track customer orders. Typically, a job contains a collection of parts with varying quantities and due dates. New jobs can be imported from spreadsheets, or they can be created from existing parts in the part library. Select the Open icon on the left side of the main screen or use the shortcut key O. The user will be able to open and import Jobs from a CSV, XLS or XLSX file. The user can also select a part or a batch of parts which are already uploaded to Praxis and right-click to select New Job.
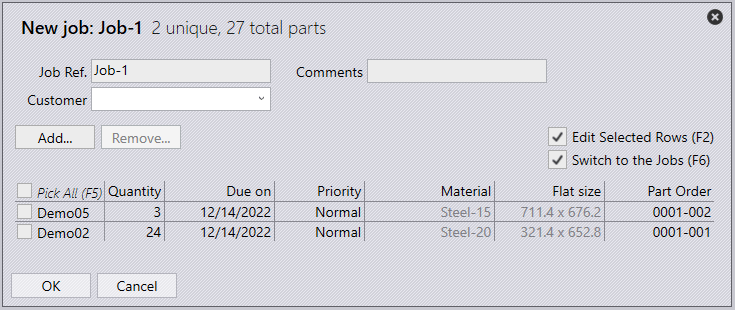
Job Ref – This text box is where the user can add the reference of the JOB.
Comments – This text box is where comments relating to the JOB can be added.
Customer – This drop-down is all the existing customers which can be chosen. A new customer can be entered here and it will be saved inside praxis for future purposes.
Add – This option adds parts from the Part Library
Remove – This option will remove the selected parts from the JOB.
Checkbox – This checkbox allows for desired parts to be deleted or edited together.
Quantity – This value is the quantity of the part that will be nested in the JOB.
Due on – This is the due date for the JOB to be completed.
Priority – This is the priority of the part within the JOB.
- Low – Represented by the colour grey. Low priority would mean the software would place the part on the sheet if there is space available once all the other parts are nested.
- Normal – No colour. Normal priority would mean the stated quantity of the part would be nested.
- High – Represented by the colour yellow. A high priority would mean the software would place the part on the sheet before nesting normal or low-priority parts.
- Urgent – Represented by the colour orange. This is the highest priority and would mean the software would nest this part before any other parts to ensure it is nested.
Material – This states the material of the part. This section cannot be edited here.
Flat Size – This states the flat parameters of the part. This section cannot be edited here.
Part Order – This field is used to store the unique job item tracking number. The same part can be added to a job with different tracking numbers.
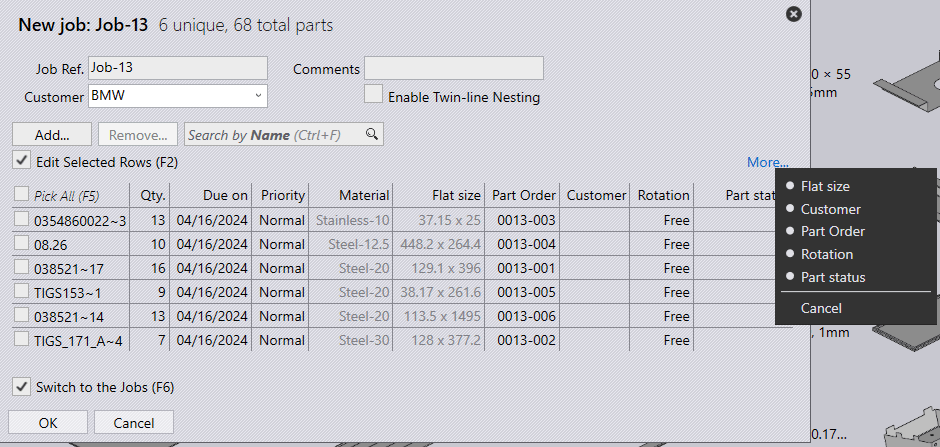
The nesting rotation angle can be selected for each job item in the New/Edit Job dialogue. This optional field is not available by default and can be selected by clicking on the More… hyperlink. This hyperlink can be used to select other custom job item fields like Customer, Part-Order etc.
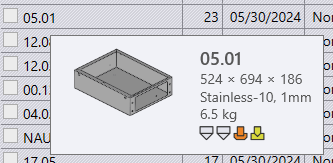
A tooltip is displayed when the mouse is placed over the part name in the new job dialogue. The tooltip displays the part thumbnail along with the basic part properties and tooling details.
Once the JOB has been created it can now be scheduled to be Bent and Cut. This is done by right-clicking on the JOB to display the Job dialogue, here the Job can be viewed, modified and/or planned.
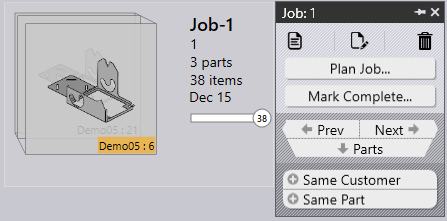
View Icon – This command is used to open the New JOB dialogue in read-only mode for viewing.
Edit Icon – This command is used to check out the New Job for editing.
Bin Icon – This command is used to delete the JOB. This will not delete the Parts from the Part Library.
Plan Job – The job is planned in two stages. Plan a job by choosing the bending machine first and then the cutting machine.
Parts are nested automatically once job planning is successful.
Use the optimise command to re-order parts in the nested layout for better optimisation of the sheet.
Mark Complete – Mark the Job as complete and route the parts and layouts to the next work step.
Prev – This is a navigational switch to go to the previous item.
Next – This is a navigational switch to go to the next item.
Parts – This will display the editing parts dialogue.
Same Customer – This will highlight all jobs which share the same customer.
Same Part – This will highlight all the jobs which share the same part.
Once a Job has been planned nests will automatically start to be made. Double-click on the job to view the parts within the Job and the Layouts which have been created. Selecting a layout will highlight the layout itself as well as all parts nesting on the layout in the part list.

The status taskbar gives a visual representation of the situation at a particular time during a process. A tooltip is displayed when hovering the mouse over the taskbar which will give a short statement of the current process.
Yellow Status – This indicates that the parts have successfully been nested and the sheet is ready to be cut.
Pink Status – This indicates that the parts within the job are currently nesting.
White Status – This indicates that all the parts within the job are ready to be planned.
Light Grey Status – This indicates that some or all of the parts within the job are not ready and need to be reviewed. This could be due to a part/tooling error.
Dark Grey Status – This indicates that the sheets needed for nesting are not available.
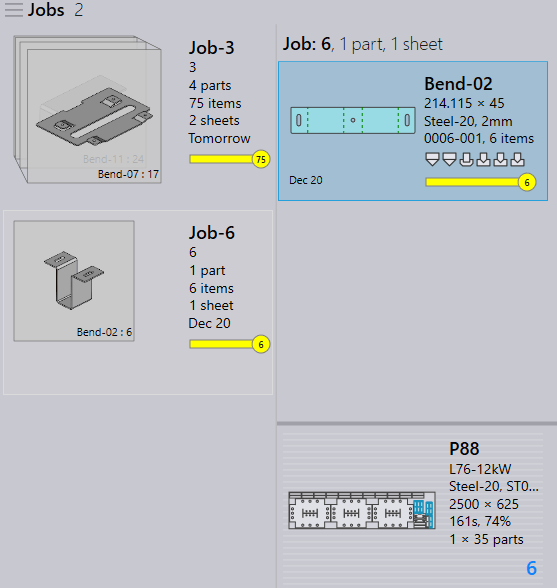
If creating a new Job of a part/s which shares the same material as an already planned Job, planning the new job on the same cutting machine will repack the existing layouts to find if there is space to accommodate extra parts. As shown in the image below, Job-6 which contains 1 part has been nested with parts from Job-3 as the sheet utilisation is greatly improved.